


An all-around C++ & Python Wireless Robotics WalkThrough
The whole process is a race to synchronize everything and to make it work perfectly with each other. Like synchronizing serial bus ports with Baud rates or like counting overheating on your voltage regulation transistor. The trickiest part has to do with linux and networking. You may end up spending hours troubleshooting file permissions and asking yourself what is wrong with your port forwarding. Remember to take that in consideration when planing the project.
I‘ve always been a big fan of robotics and I always wanted to build a robot someday. But something like that requires a lot of knowledge about electronic circuits, programming in multiple languages, networking and system administration… That all sounded a bit too much for a developer like me.
One day I decided to try with what I had and started searching on the internet for some open-source hardware that I can program. I was surprised when I discovered Arduino and Raspberry Pi. I was surprised not only by their great combined capabilities but also by their huge and passionate community which makes it much easier and fun to work with.
In this article, I will share with you some basic and all-around considerations / key points on how I built my first fully operational wireless robot.
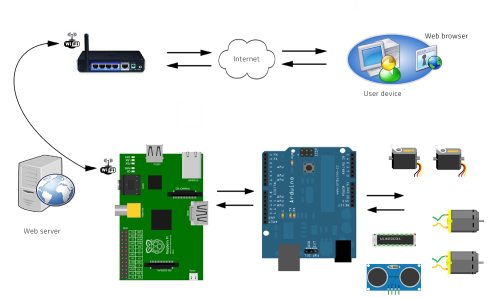
The initial idea was to build a robot that will stay at home and can be controlled from any computer, in or out of the home network. That will require a web server with an interface to provide me every time with a user-friendly way to control it. This server will be hosted in Raspberry Pi which will process the request and give the appropriate commands to Arduino. With Arduino, we can easily control analog sensors and motors to bring the robot to life.
For the robot to be wireless we need to include Raspberry on the chassis apart from Arduino. This way our robot will communicate with the home router through a WiFi dongle.
A simple command flow of the system is the following:
To break down things we need to configure:
1. Arduino
2. Raspberry
3. Circuit
4. Router
Arduino
Arduino will be the main controller for all of our sensors and motors. It will receive the messages we give from Raspberry, and act accordingly. So we need to come up with an efficient protocol for serial communication. In my case, I used the convention command: value. The first part states the action we want to make and the value of the action’s value. For instance, I’ll send the command “2:100” if I want the robot to start moving forward with a motor speed of 100 or “3:250” if I want it to turn right with a speed 250 and so on.
After you initialize the serial bus with a logical baud rate inside the loop you can put this code:
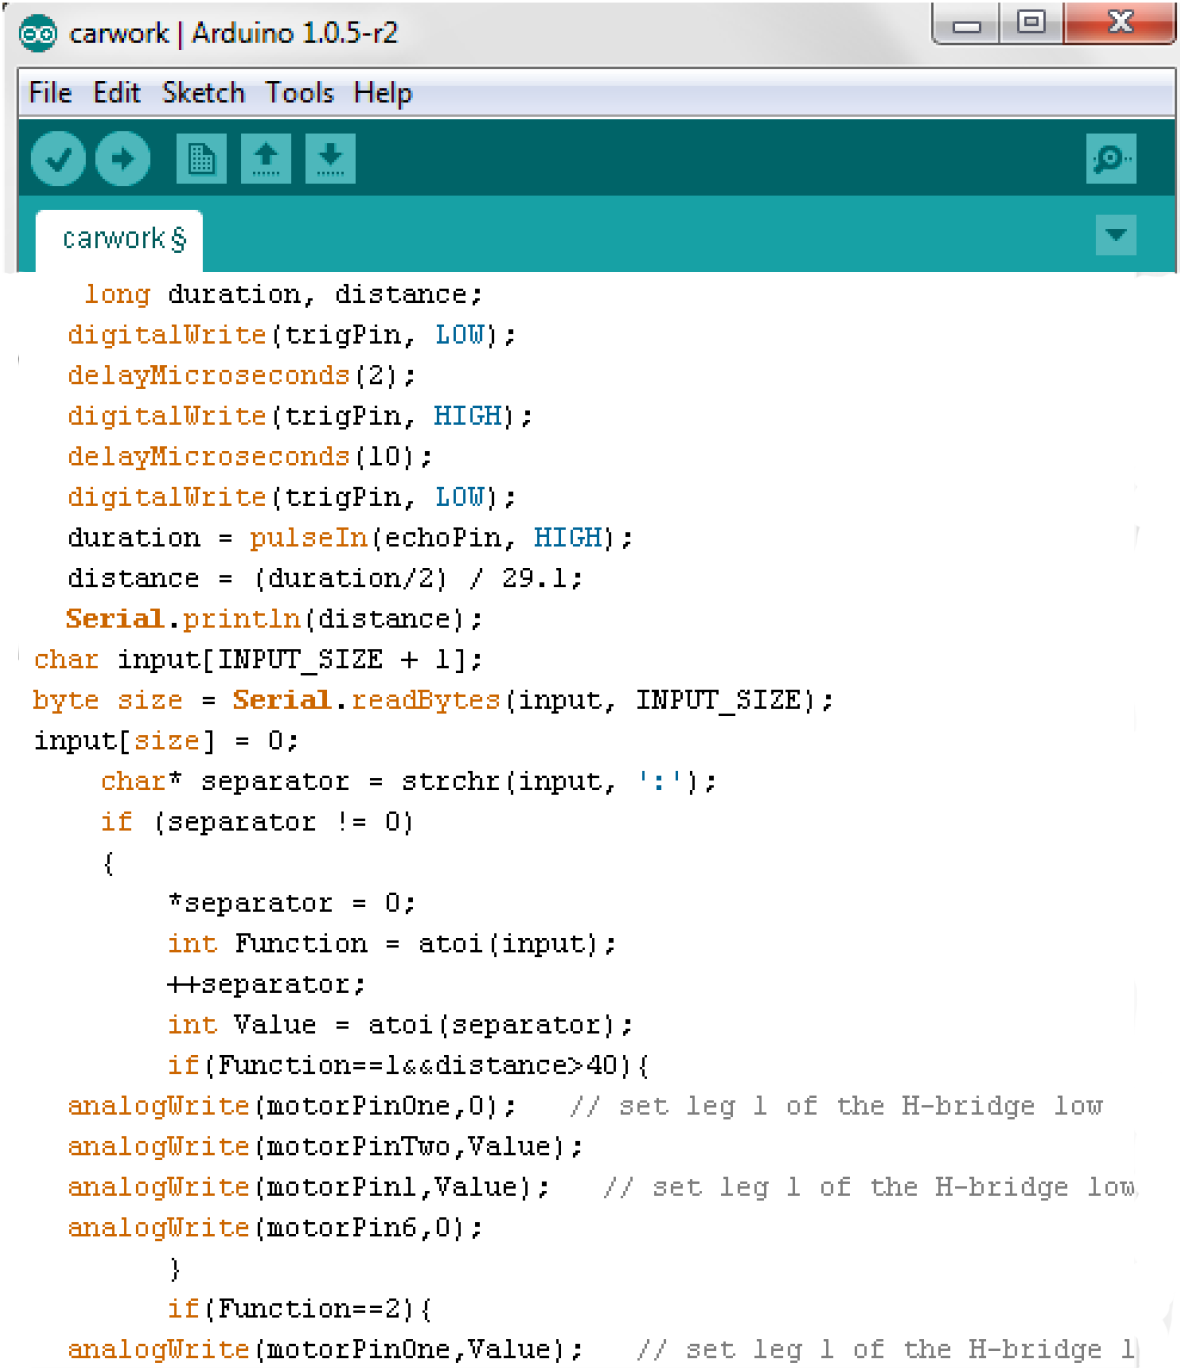
The first piece of code is triggering the ultrasonic transceiver and calculates the distance from any obstacle in front of the robot measured in centimeters.
What the second piece does is read the input from the serial port, divide it in 2 pieces according to the position of “:”. Depending on what function we stated in the input the if-else statement will execute the appropriate command setting the sensors to the value we stated.
After you connect some motors, servos or any other sensors you want you are good to go. Having built the Serial library means we can test the commands from the Arduino software directly. So you should definitely make sure everything works great before proceeding any further.
Raspberry Pi
Raspberry will be the main brain of the system communicating with the web server, router and Arduino. Here we have to install and configure a lot of things:
- Install an Operating System (I recommend Raspian)
- Install a WiFi dongle
- Install Python
- Install the GPIO(optional if you want to use the onboard pins)
- Enable SSH(after you assemble the chassis it will be much easier to work remotely on linux via ssh)
- Configure a local network static IP
- Install a Dynamic DNS client (i strongly suggest no-ip)
- Create and configure a startup script for the operating system (here you ll call all of the services you need to automatically start on boot)
- Install Apache server and PHP and configure it
- Install MySql and configure it (optional)
- Install FTP server
- Build an Arduino Input Library
- Configure cgi-bin and add .htaccess
After these configurations are done we need to implement the web server functionality and the output library. The last one will be responsible for translating the user’s interaction into valid commands of Arduino‘s library that we previously built.
Web Server
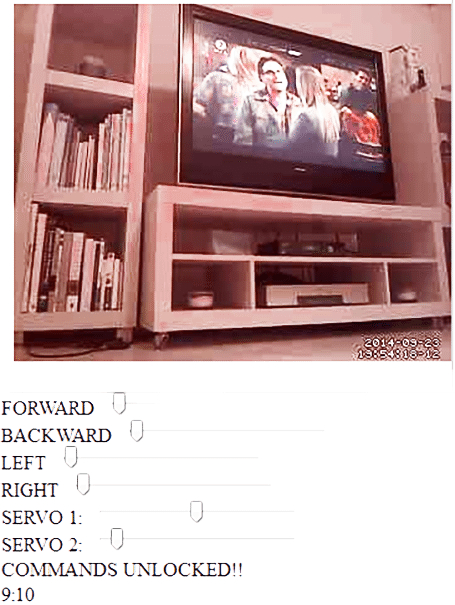
A simple implementation would be to create an HTML page with 4 sliders.
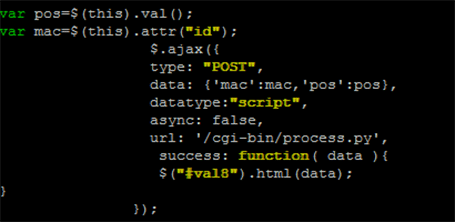
Each one of them will correspond to one “action” and its value will stand for the action’s value. Forward, Backward, Left and Right. On changing the value of any of them we will call a python file in the cgi-bin using JQuery Ajax call.
The code looks like this:
For my robot’s web interface, I added:
- An iframe, to display the live stream from the onboard camera
- Lock / Unlock the functionality of the sliders for a certain amount of time so as to prevent overload in the communication bus.
- Also, at the bottom of the interface, I added a small text field to display the ongoing message to Arduino that is returned by Ajax on every command.
The simplified interface looked like this:
Library to Arduino
After a user changes the value of a slider, a Python file will be called in CGI-bin. We also pass the data of the slider through the Ajax call. Inside the Python file, we should translate this information according to our robot’s library. For example:
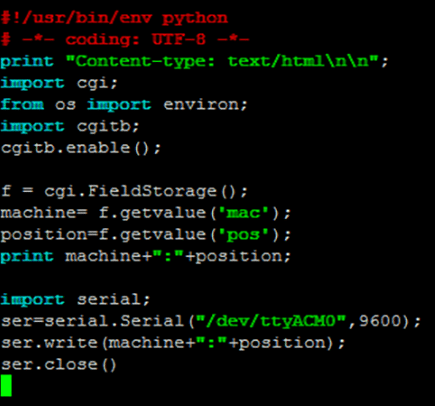
Hereafter we state how we want to interpret our script, we state the USB port and baud rate that our Arduino is using. There are a lot of ways to trace where is your device connected in the Linux environment like “dmesg”.
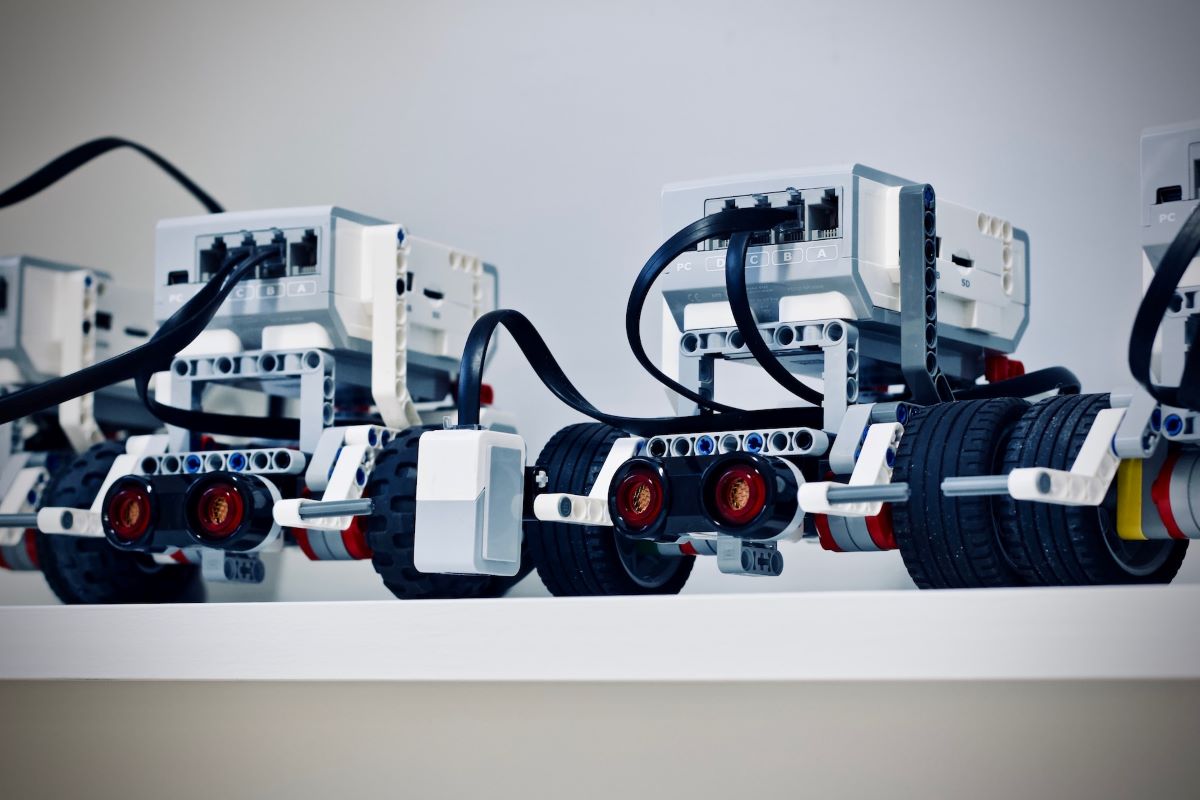
Circuit
This will always depend on what sensors and general components you want to include in your project. The things you’ll need for sure are motors. I used 2 simple DC motors tied up to a motor controller that can provide me with current flow change. You’ll also need a power supply. This topic is really important as it can easily burn both Arduino and Raspberry. I used 6 AA batteries in series directly to my motors and through a voltage regulation transistor to Raspberry. This voltage will be enough to supply all of my components for several hours. Arduino is powered up through the serial port from Raspberry so it doesn’t require any more power supply.

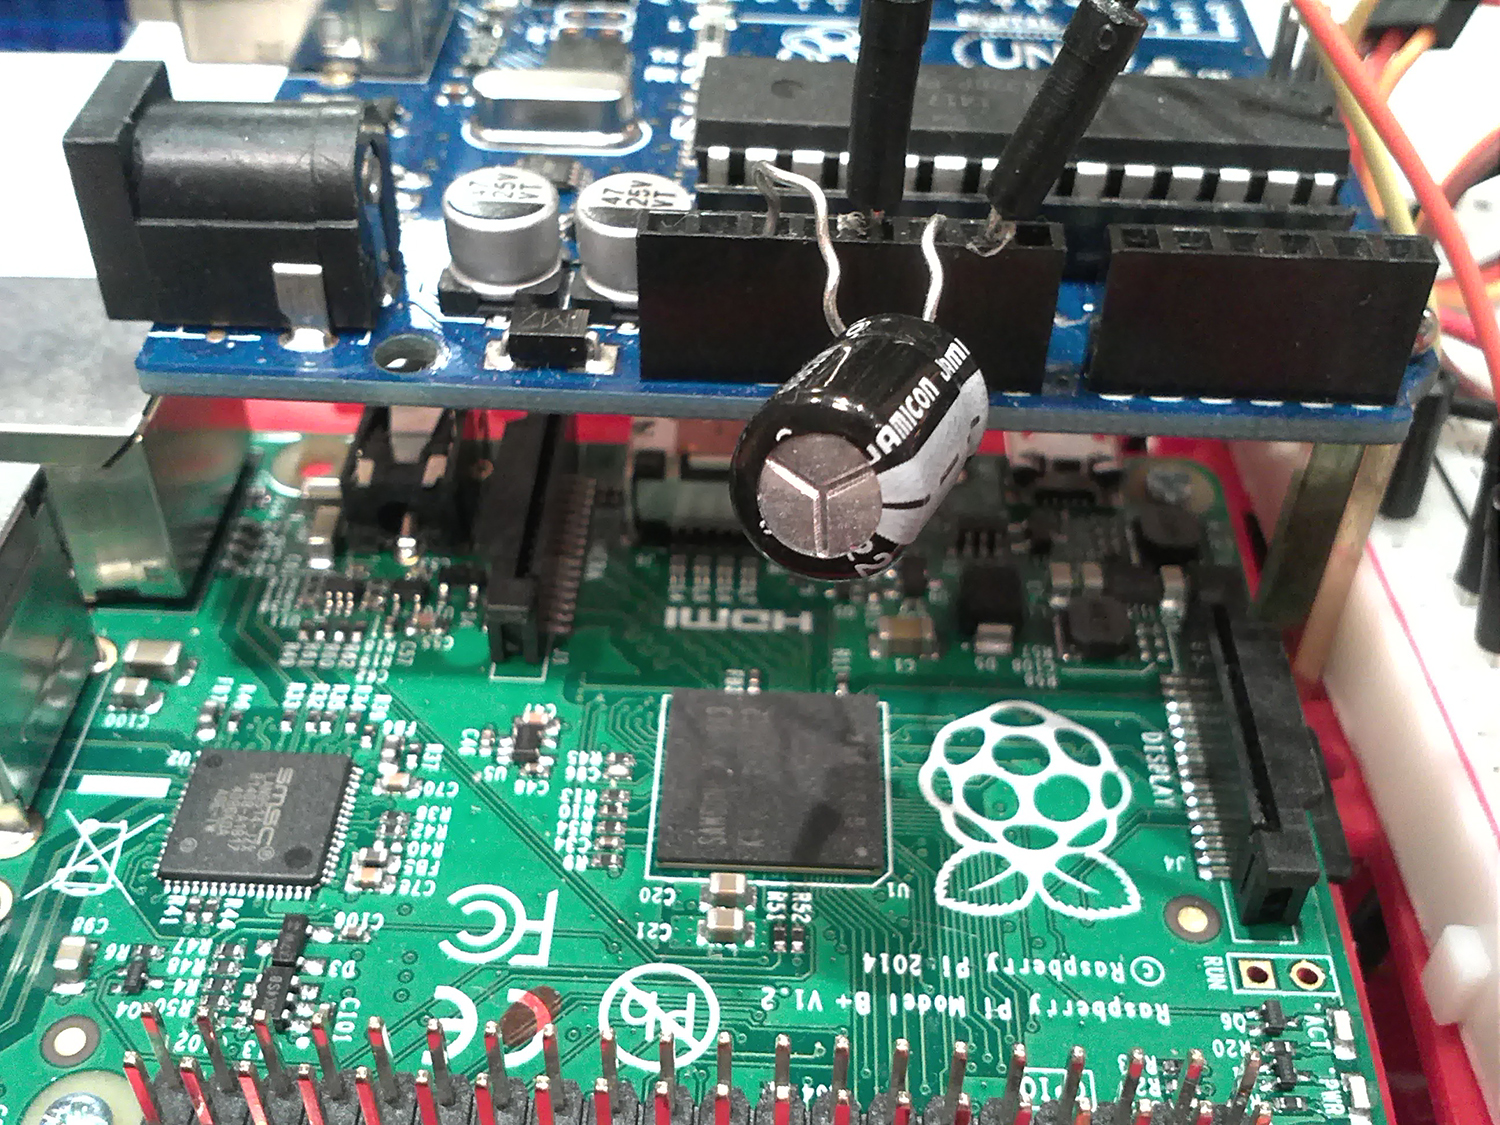
An important key point is that python closes the serial each time a command is given making Arduino restart. A fast hack for this is providing a 220μF electrolytic capacitor between GND and restart. That will make the trick but you will be unable to upload any more code to Arduino.
Router
By now we have a fully operational robot. Locally. Raspberry is given a static IP each time we power it up and our Dynamic DNS client is giving each time a specific domain name to our dynamic public IP. If we navigate with our web browser to our domain name though we can’t reach our user interface. The process stops in our router. That is because our router’s port is not assigned to any device’s port. This process is called port forwarding and it is essential. Access your router’s panel and create a rule from whatever port you like, to the port specified in your Apache’s configuration file.
The Result
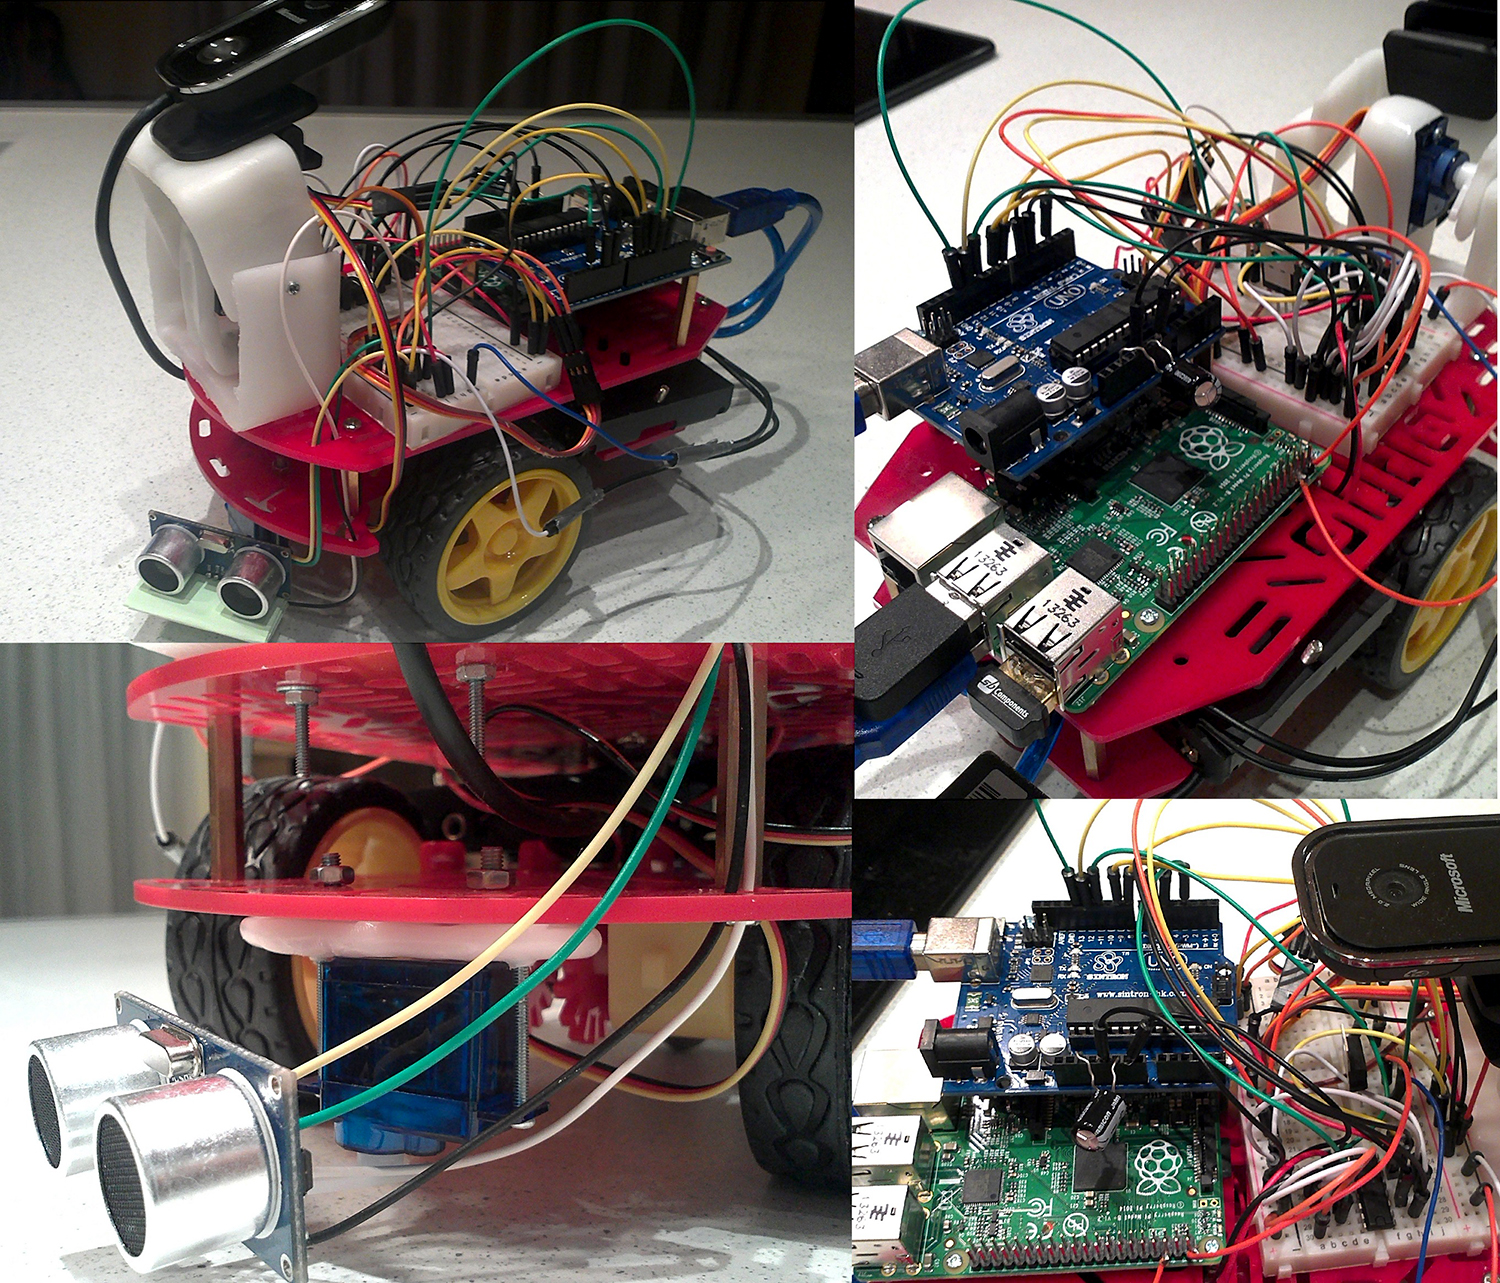
In the end my little robot can:
- Move forwards, backward, turn left and right
- Stop before it hits any object, because of ultraSonic sensors
- Serve live stream to the user interface via mounted web camera
- 2 micro servos (9g) rotate the UltraSonic sensors and the Camera
Final thought
The whole process is a race to synchronize everything and work perfectly with each other. From synchronizing serial bus ports with Baud rates to counting overheating on your voltage regulation transistor. The trickiest part though has to do with Linux and networking. You may end up spending hours troubleshooting file permissions or asking yourself what is wrong with your port forwarding. Remember to take that into consideration when planning the project.
And finally, some things you may find useful:
- If you don’t need to measure your robot’s exact movement then, DC motors is the best solution for you.
- You can adjust servos to work as motors, rotating continuously.
- Ultrasonic sensors is a great toy for you and a great tool for your robot!
- If your project requires a camera feed then Motion is a great spycam library to supply you with the appropriate tools in Linux. You may spend some time configuring it but it definitely worth it.
- You may want to use a less crowded channel of wifi using a wifi analyzer tool.
- There is a great biodegradable polyester material called InstaMorph 😉
Thank you for reading!
The Greek connection. When not skiing you can find him on his Yamaha hog