How To Install Facebook Pixel On Your Website
Have you ever wanted to target your website visitors with Facebook ads? Maybe just people who put something in their cart but didn’t checkout?
Facebook made this possible by introducing Pixel.
Pixel is Facebook’s advertising tool which allows us to track Facebook users on our website and retarget them with our ads. Combining the features of Conversion pixel and Custom audience pixel into one, Pixel is more easy to use and is one of the best advertising features you have to try if you’re serious about online advertising.
By placing a Pixel code on your website you get to measure and optimize your ads for conversions based on a custom created audience. Sounds interesting? Yep, read on, because you’ll have it on your website in no time.
Step 1. Install Facebook Pixel on your website
First, we need to get a Pixel code from Facebook and install it on our website. It does all the magic with collecting data about our customer activity.
1. Open your Ads Manager
2. Go to Tools > Pixels
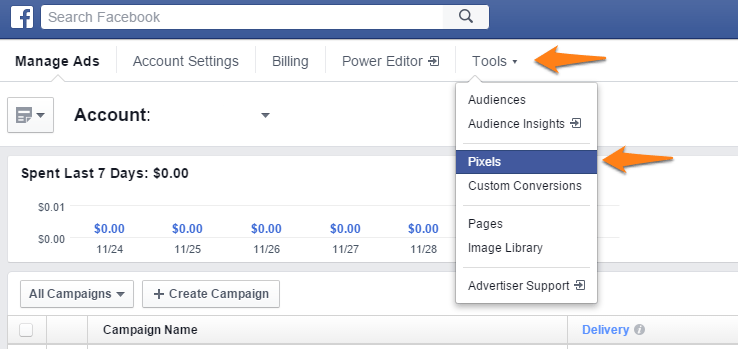
3. Click on “Create a Pixel”
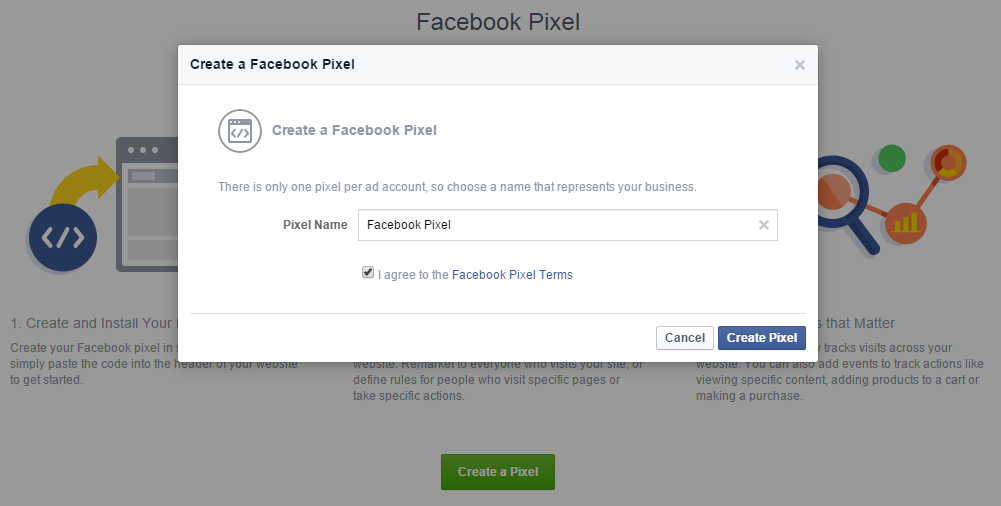
4. Name your Pixel, agree to Facebook Pixel terms and click “Create Pixel”
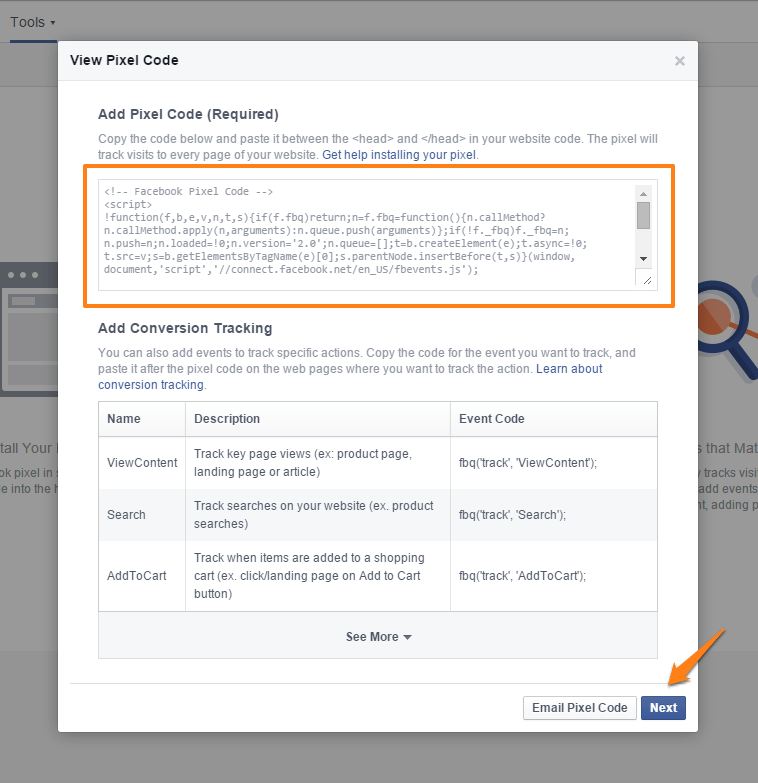
5. Facebook gives you the option to install Pixel immediately or email Pixel code to your developer. Clicking on the “install Pixel immediately” you get to see your Pixel code. Click Next.
6. In the new window you have the option to create your first Custom Audience and set up Custom conversions (we’ll do this latter). Click “Done”.
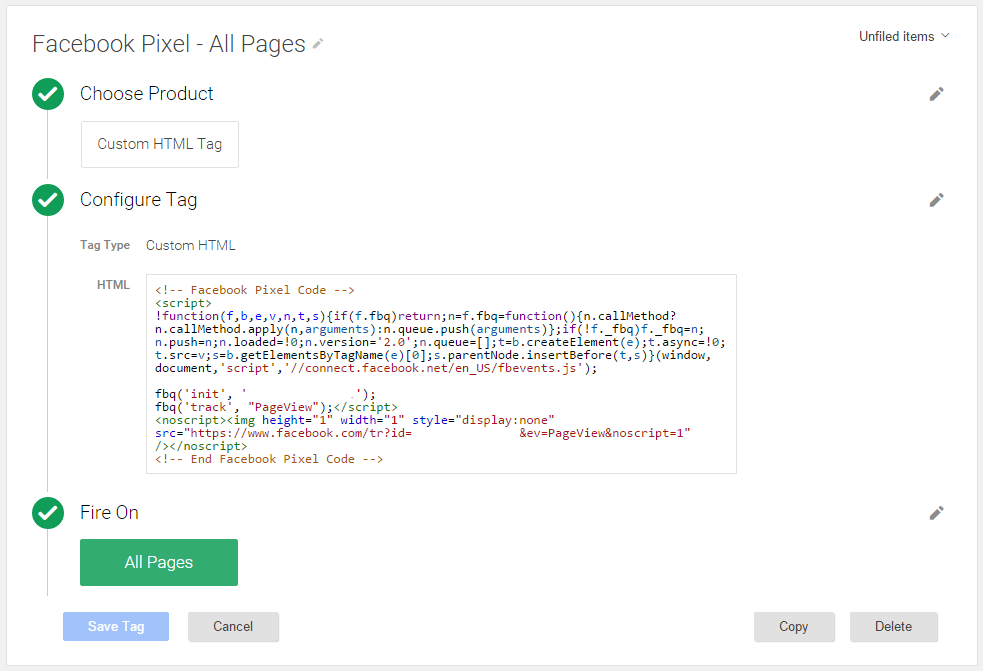
But wait, you’re almost done. First, you need to copy your Pixel code on your website. Place it between the <head></head> tags to get it activated. We used Google Tag Manager for this.
Installing Facebook Pixel with Google Tag Manager
Installing Pixel code using GTM is very easy. If you’re already familiar with GTM interface you can install this code in a moment without . When you log in, click on the tags and create new. Name your tag and pick custom HTML tag option. At the “Configure Tag” part, copy and paste the Pixel code in the empty field. To finish the process, set up your tag to fire on “All pages” and click “Create tag”. Don’t forget to publish your new tag and you’re done.
Step 2. Verify your pixel installation
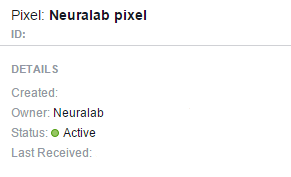
Soon after Pixel starts accumulating stats from visits, you will see status “Active” in the upper right corner of Facebook Pixel window.
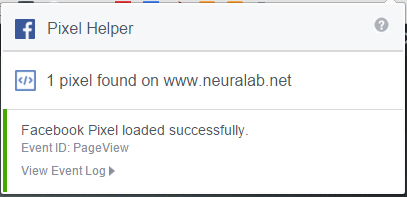
You can also use Facebook Pixel Helper to check if Pixel is properly installed on your web.
All good?
Congrats. You have your first Pixel ready and activated.
In the next steps, we are going to create custom audience and set up conversion tracking. With these two additions, your remarketing is ready to launch. Just one note. Facebook allows only one Pixel per ad account so don’t get mad if you can’t find an option to create another one.
Step 3. Create custom audience
Let’s say you want to target your Facebook ads only to people who visited your website. And then you want to target your ads only to people who visited your product page. You want to go even more into this by targeting visitors who made a purchase on your site. And the one we like the most, you want your ads to be shown only to visitors who put something in their cart but didn’t checkout (Abandoned cart visitors). You are remarketing ready with a few clicks by creating custom audiences in Ads manager or in our case Facebook Business Manager.
Either way, if you’re in your ad account, click on Tools > Pixels. On the Facebook Pixel page, just above the graph, click on “Create Audience”. In the pop up window you get to choose the rules for which your audience is built with the help of Pixel code we installed earlier.
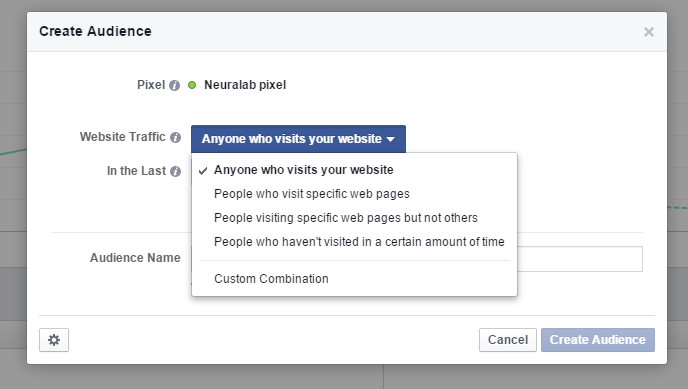
Click on Create Audience and your custom audience is now visible in Facebook Pixel page at the right side of the screen. You can also see it on Audiences page by clicking on Tools > audiences. Here you can view the type of your created audience (in our case custom audience), size, status and date when you created it.
There you go, you have your first custom audience.
In the last step we are going to set up custom conversion, so we can optimize our ads for certain actions people take on our website.
Custom conversions will give us info about our ad’s performance. This will let us know if we are wasting our budget or do ads lead to a conversion (like product purchase).
Step 4. Create custom conversion
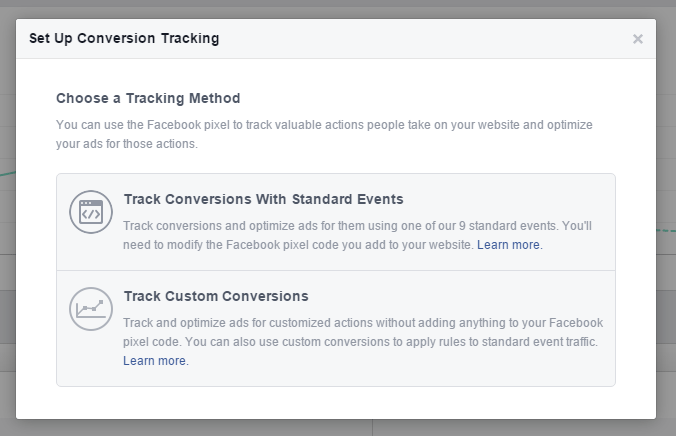
To create one, again, right from the Pixel page and above the graph, click on “Create Conversion”. Pop up window will appear asking you to choose between creating conversions with standard events or custom conversions.
Conversions with Standard events require you to modify installed Pixel code and custom conversion lets you track and optimize ads for actions without adding anything to your Pixel code.
Standard events include:
- View Content
- Search
- Add to Cart
- Add to Wishlist
- Initiating Checkout process
- Add payment information
- Purchase
- Lead
- Complete registration
Choosing custom conversion opens a similar window as creating custom audience. You need to define a set of rules that will trigger your newly created conversion.
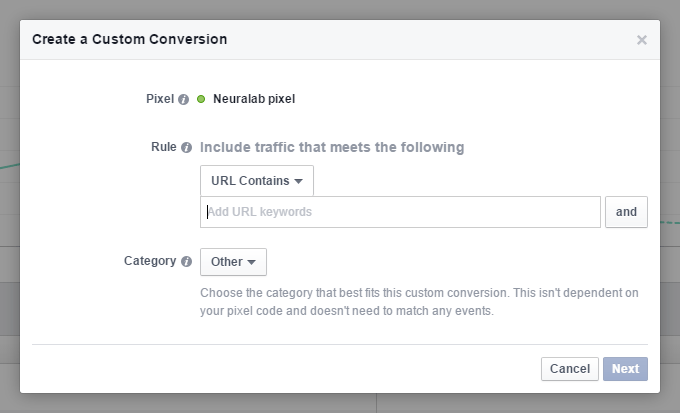
In the next step, enter the name for your conversion and optionally if you want, set up conversion value. Click “Create” and you have created your first custom conversion. You can see your created conversion on the right side of Facebook pixel page. Another way to access it is to go to Tools > Custom conversions. Note: at the moment of writing this article, Facebook didn’t include the option to delete custom created conversion, so fingers crossed we’ll see that option soon.
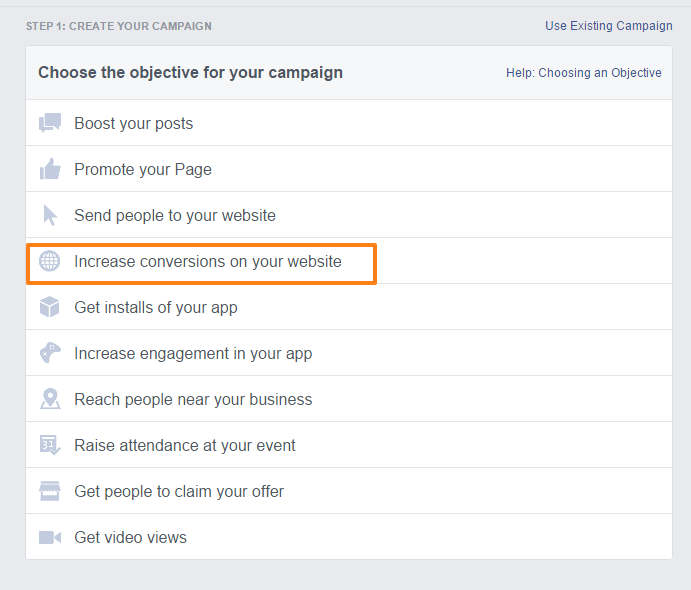
There you go. Now when you’re setting up a new campaign, you’re fully ready to use Facebook’s “Increase conversions on your website” objective. Using this objective you can optimize your ads for conversion you set previously.
This is it. Hope you made it to the end without any problems. Now go and do your remarketing stuff more efficiently using Facebook Pixel.
Reach out to us if you have any comments or questions regarding this blog post or any other topic.


